Monday, May 21, 2012

Ankle boots made of leather

These are similar to the white ankle boots I made earlier. The main difference is the material, which was leather this time. That meant that I could glue the seams instead of sewing.
 

I had lost the PDF file with the text I use in the insoles, so instead of trying to recreate that I decided to scan and use my own text (the original used a font available in Word 2007, but I had forgotten its name).


This photo shows the boot's upper part finished. Only the outer sole and heel are missing.


Here are the finished boots on Ghoulia. This method of buttoning the boots works very well, so I'm sure I will apply it to some other designs as well.


Saturday, May 19, 2012

Repainted Draculaura's boots

It's been some time since my last post. I have mostly unfinished projects at the moment, but also a couple of finished ones, first one of which is this (these have been finished for some time, I just haven't posted the photos here).

As I bought two Draculauras, I had two pairs of her boots and decided to paint one pair. The first picture shows the boots with several coats of the basic color. Covering that bright pink requires a lot of coats when using a light color.

Next, some details in place.

The colors used so far are these.

The blue used for the strap is my own mix left over from a dollhouse project.

The finished boots sealed with satin sealer. It seems to be working well as I have put these on the doll's feet and taken them off several times without any problems. Same with the pair I repainted earlier.

Tuesday, November 22, 2011

Another pair of ankle boots

I wanted to make a white pair of ankle boots for Spectra the same way I made greyscale Ghoulia's boots. The photo below shows a closeup of the material I planned to use. It's half fabric, half some sort of plastic.

Here are the main parts for the boots with the plastic side (outside) facing up.

I used these scissors for cutting some edges. As these are actually meant for cutting cardboard, they were not sharp enough for soft plastic and I had to finish the cutting with regular scissors.

I tried gluing the back seams, but that didn't hold, so I decided to sew them.

I also sewed the front seam. As the fabric side was inside, gluing the uppers in place was not a problem.

This time I glued the toe part in place at this point, which actually turned out to be the better way to do it.

Then I made the button holes.

The heels are made of wood again, but I decided to paint them, because the plastic material was too thick for covering them.

Then I sewed the buttons in place the same way as previously, glued the heels in place, and glued pieces of leather as outer soles.

Here are some photos of the finished shoes.


Wednesday, November 9, 2011

Greyscale Ghoulia's ankle boots

The customized Ghoulia still needs an outfit and I decided to start with her shoes. As I'm thinking of making her an old-fashioned dress, I searched for old shoes designs and found this in one of my books about shoes. The only problem is the height of the heels. The old techniques for making shoes had limitations in that respect, but Ghoulia has high heel feet, so I had to sacrifice some authenticity.

Here are the parts for the shoes. They are all leather, except the two layers of cardboard under the insoles. The patterns for these were a bit trickier to make than normally and I started with discarded pieces of fabric, so I wouldn't waste any leather. The toe part is separate, because it would be hard to handle a seam going lengthwise there.

Next, I glued the front seams.

And then the back seam.

Because of the seams, it was important to position the uppers just right. To do this, you need to glue the flap at the back seam first and then a couple of places in the toe part. This keeps the upper in correct place while gluing the rest.

Then I made holes for the buttons in the flap and sewed the buttons to the other side. You need to make the holes first, put the shoe on the doll's foot, place the flap where it should be when the shoe is closed and then use a pen to mark the places for the buttons. The holes are the smallest my tool could make, probably 2 mm (or slightly smaller as I use that size when inserting 2 mm eyelets to leather and it's a bit tight). I used small beads as buttons and they suit the purpose well.
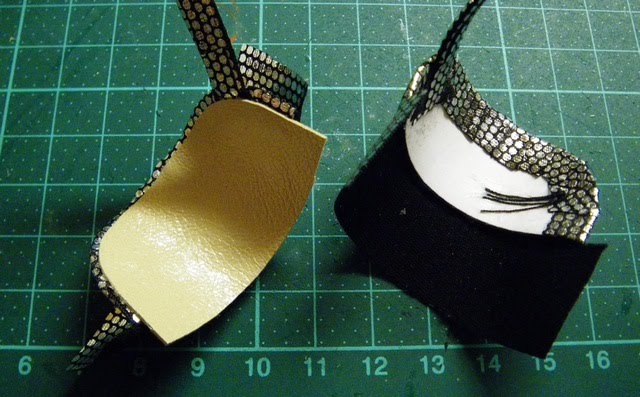
I made the heels the same way as the heels for Draculaura's boots, glued them in place and glued pieces of leather as outer soles.


Thursday, October 20, 2011

Platform sandals for Miss Piggy

As I was looking through some fashion magazines from this year and cutting shoe pictures for later reference, I got several new ideas. One of them came from this picture of a Prada shoe. I rarely make replicas, so the basic construction is from this, but I used black leather and the fabric I used for Monster High doll shoes earlier.

I started by cutting the toe parts from cork. I used leftover pieces from the cork board I used for the dollhouse front wall, so it was too coarse to be used as such, but was fine for this as it was going to be covered in thick leather. The heels are cut from a round wooden stick. Getting the right angle on the top was tricky as a mitre box is meant for cutting in 45 degree angle, which would have been too steep. So, I had to keep the piece of wood in angle in the mitre box during sawing.

I covered the pieces with leather. The pieces of leather in the top and bottom of the cork parts are there to help keep the soles even.

The insoles have two layers of cardboard and one of leather. The outer soles have three layers of cardboard with leather strips glued to the sides and leftover pieces glued to the top and bottom. The cardboard in the insoles will take care of small unevenness, but without the leftover pieces in the middle of the outer soles, the center part of the insoles would be lower than the edges when the soles are glued together.

The straps are glued in place here. They consist of leather strips covered with fabric (the fabric was too thin to use alone). The leather parts do not go under the insoles, just the fabric. Leather is too thick and would make the insoles bumpy.

Here are the parts so far. The parts that go behind the heel are made of leather and one layer of cardboard. The reason for using cardboard is that it keeps the parts in correct shape when you glue the fabric in place.

Next, I glued the cork parts to the outer soles and covered the heel parts with fabric. The light colored leather pieces shown beside them are the innermost pieces that will cover the flaps of glued fabric.

This closeup shows the construction better. The ankle straps are also in place here and so are the beads that will be used for closing them. The ends of the straps and the thread used to attach the beads will all be hidden under the leather pieces.

Here is the upper part of the right shoe almost finished.

The same in a side view after gluing the outer sole in place.

The loops for closing the ankle straps are made of thin rubber band and glued in place.

Almost finished. The parts in the middle are the leather pieces to be glued on the bottom of the outer soles to cover them.

The final step was to glue the heels in place. Here are the finished shoes.

And finally, the shoes on Miss Piggy's feet.

Sunday, October 16, 2011

Booties for Jessica Rabbit

I started these over a year ago and managed to finish the cork soles, but then abandoned the project for something else. As I was going through some shoe pictures in fashion magazines, I got inspiration to finish these.

The soles consist of four parts each, the bottom and three vertical parts that form the wedge heel. When cutting the vertical parts, it's best to get the arch correct right from the start. Everything else is easy to carve into the right shape afterwards.


Here the heels are glued in place, but not yet carved into correct shape. Also, the bottom parts are a bit too long, but they were left that way on purpose, so it would be easy to get seamless fit with the wedges.

Here are the finished soles. As there won't be anything to cover the cork surface, it is important to get the seams as invisible as possible.

As I continued the project today, I first made the leather insoles. There was no need to use cardboard as the uppers were not going to go under the insoles.

I glued the edges of the uppers to the cork. Basically, you could finish the process here and use the shoes like this. However, I wanted something a bit different this time.

These are the parts that go around the ankles. I used 2 mm eylets and glued pieces of leather to the inside to protect the doll's feet from scratches.

Here are the ankle parts glued in place.

Then I hammered tiny nails to the edges of uppers. These are not necessary, because glue keeps the uppers in place, but I added them for decoration. You need to be careful to get the nails straight or they will come out through the insole or bottom of the cork sole. The shorter the nails are, the better.

Next, I glued pieces of leather to the bottom of the soles and made laces using cotton yarn. The beads in the ends of the laces are for decoration and also to keep the ends hanging down (that looks so much neater).