skip to main |
skip to sidebar
I haven't made any new shoes for some time, but I did make an outfit for the American Model that can be used with the boots shown in the previous post.
Original Finnish post is here.
I had tried making boots for Cissy once, but they did not succeed and had to be converted to ankle boots instead.
 I was not going to give up, though, and tried another pair, this time for the American Model.
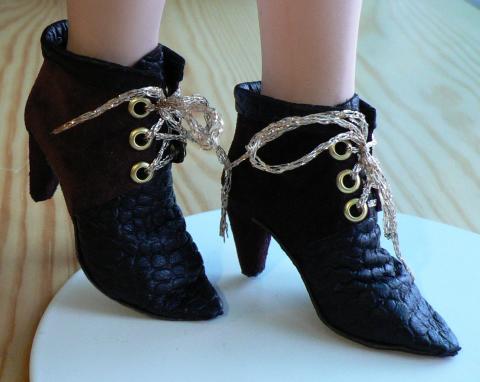
The boots are made of leather and there is a zipper on the back. I did not even try to sew the zipper, I just glued it in place. The front has eyelets for the strings. This way, the boots fit tight, but you only need to loosen the strings a little when putting the shoes on the doll's feet.
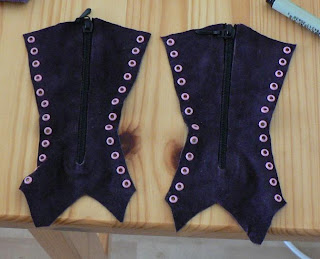 I'm sure the neighbor downstairs was not happy when I started banging those eyelets in place. There are 48 of them in total and each required a couple of hard hits with the hammer.
I would have preferred metal color, but I only had the required amount in pastel colors and pink was most suitable of them.
There wasn't enough of that dark purple leather, so the boots ended up having two colors. Actually, that was a good choice considering the color of those eyelets.
 Then I made the heels using modeling clay. The outer soles are made of leather and the strings are made of cotton yarn.
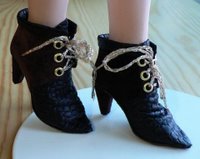
 The boots are shown here in plaster castings of the doll's feet.
Original Finnish posts: March 2, 2007, and February 16, 2006
I made a wedge sole (shown on the right in the next picture) for making a latex mould, but then I realized that it would be fairly easy to use it to build a metal mould for casting plastic.
The moulds are made of thin copper sheet. Before cutting the sheet (with scissors, which have suffered quite a lot due to this habit), I covered it with clear packaging tape. This is meant for the inside of the mould to ensure that the plastic casting will have shiny surface. The pieces of the mould are held together by normal adhesive tape. Note that there are small pieces of wood under the toe part to keep the moulds straight.
 The plastic I'm using is the type you need to heat in order to melt it. The brand name is E-Z Water and the only reason I'm using that is that it's the only brand I have found. The plastic is in the form of small grains.
The plastic is slightly yellow and if it gets too hot, it starts getting darker. I'm using the lowest possible temperature in which I can get it to melt, so the color won't change. Also, if the melted plastic is too hot, it will melt the packaging tape and the adhesive tape holding the moulds together. The result of that is a horrible mess as I once found out. Fortunately, I only managed to ruin the kitchen counter instead of burning myself with the stuff (even in the lowest temperature, it's still hot).
Before pouring the plastic into the mould, I placed a paper flower in the mould. As the flower had a stem, it was easy to hold it in place until the plastic had cooled down enough, so the flower would stay in place by itself.
 You need to wait until the plastic has cooled down. Then you need to tear apart the mould to get the casting out. I usually do this when the casting is still a bit warm to touch, but not hot. Leave the casting to cool down properly after removing it from the mould.
Here are two pictures of a finished casting. There are some air bubbles in it, but I have noticed that it is almost impossible to avoid them altogether in castings of this size.

 Here are the shoes I made using these castings. The ribbons are made of silk and the inner sole and strap are made of satin that was treated with sealer. The outer sole is again made of leather.

Original Finnish posts: Feb. 20, 2007, and July 7, 2007
I had swatches of furniture fabric in several colors. I treated the fabrics with sealer (FolkArt Outdoor Satin Sealer) to prevent fraying and staining. After I had made shoes for larger dolls, there was still enough fabric left to make one pair of shoes in each color for Tiny Betsy.
This model is very simple. It requires minimum amount of glueing. The inner sole is made of the same fabric as the upper part. The outer sole is leather.
As the shoe has open toe, it is easy to glue. All you need to glue are the sides under the inner sole, the strap behind the ankle, and finally the outer sole. You can also glue a small piece of leather as the heel of the shoe.
You can use fairly thick fabrics for this model as the sides are straight, which makes it easy to glue them.
 Here is the full set of shoes. Some of the decorations are glued to place, some attached with sewing thread.
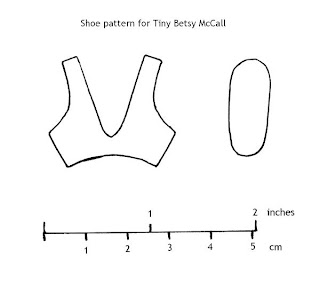
 If you want to try making this kind of shoes for your doll, here is the pattern. Save the picture on your computer and print it making sure that the scale in the picture matches reality.
 If you make shoes using this pattern and put a picture of them on your web site, Flickr, etc., please leave a comment here telling me where to go to see the picture.
Original Finnish post
My Finnish blog about doll shoes has had a lot of foreign visitors lately, so I thought maybe I could create an English version for those who do not understand Finnish. I will be adding stuff here occasionally (can't promise a frequent or regular update schedule as even the Finnish blog is updated sporadically).
For more pictures, you should see the Kenkäfriikki blog. I'll try to add here the posts that contain useful instructions.
If you would like to see a translation of a specific post in the Finnish blog, leave a comment here and I'll include it in my list of posts to be translated.