Sunday, September 25, 2011
New pattern
The pattern for the Monster High boots in the previous post is now available on my web site.


Wednesday, September 21, 2011
Stretchy boots for Monster High dolls
Monster High dolls' legs are so thin that boots with zippers or laces would be hard to make, so I decided to try stretchy fabric instead.
After cutting the pieces, I sewed the back seam and made the soles (two layers of cardboard plus leather insole).

Then I put the uppers on the doll's feet, put the soles in place, and trimmed, turned and glued the uppers under the soles.

As you can see in the previous photo, there was a lot of extra fabric, but when you trim it properly, the result is neat.

I made the heels out of wood. I had some round strips of wood and decided to see how that would work. I sawed the upper parts of the heels in 45 degree angle using a mitre box. Then I measured the height of the heels and sawed them off of the strip.

Next, I used a craft knife to make the front of the heel straight.

Then I covered the heels with the same fabric I used for the uppers.

Finally, I glued pieces of leather to the bottom of the heels, glued the heels in place, and glued pieces of leather as outer soles.
Here are the finished boots on Draculaura:


After cutting the pieces, I sewed the back seam and made the soles (two layers of cardboard plus leather insole).

Then I put the uppers on the doll's feet, put the soles in place, and trimmed, turned and glued the uppers under the soles.

As you can see in the previous photo, there was a lot of extra fabric, but when you trim it properly, the result is neat.

I made the heels out of wood. I had some round strips of wood and decided to see how that would work. I sawed the upper parts of the heels in 45 degree angle using a mitre box. Then I measured the height of the heels and sawed them off of the strip.

Next, I used a craft knife to make the front of the heel straight.

Then I covered the heels with the same fabric I used for the uppers.

Finally, I glued pieces of leather to the bottom of the heels, glued the heels in place, and glued pieces of leather as outer soles.
Here are the finished boots on Draculaura:


Tuesday, September 20, 2011
Platform shoes for a Monster High doll
I had several pairs of the plaster casting soles, so I decided to make another pair of platforms. These are basically similar to the orange silk shoes I made earlier, only the ankle strap is different.
I glued the front parts of the insoles (from toes to about middle of the arch) in place before gluing the straps in place. If the strap construction is anything more complicated, it is better to do it first, but in this case only the end of the vertical strap needed to be glued under the insole.

Here is a closeup of the strap construction.

And here are the finished shoes.


I glued the front parts of the insoles (from toes to about middle of the arch) in place before gluing the straps in place. If the strap construction is anything more complicated, it is better to do it first, but in this case only the end of the vertical strap needed to be glued under the insole.

Here is a closeup of the strap construction.

And here are the finished shoes.


Monday, September 19, 2011
New shoes for Catwalk Kitty Jet
I tried to find a photo of how these looked originally, but couldn't find any. I guess I didn't take it, although I remember that I intended to. I started painting these a long time ago, but only now got them finished.

Catwalk Kitties have similar foot mechanism as Bratz dolls, so it is easy to replace their original feet. I have mostly used ankle boots on them, but wanted to try this too.
I first painted everything with black acrylic paint. You can't use solvent-based paints directly on vinyl dolls as the paint won't dry. However, with a couple of coats of acrylic paint first, it was possible to use Humbrol paints for the shoes.
I finished the black parts with satin sealer, which gives a surface that is close enough match to the doll's legs.
Here is the doll in her new shoes:


Catwalk Kitties have similar foot mechanism as Bratz dolls, so it is easy to replace their original feet. I have mostly used ankle boots on them, but wanted to try this too.
I first painted everything with black acrylic paint. You can't use solvent-based paints directly on vinyl dolls as the paint won't dry. However, with a couple of coats of acrylic paint first, it was possible to use Humbrol paints for the shoes.
I finished the black parts with satin sealer, which gives a surface that is close enough match to the doll's legs.
Here is the doll in her new shoes:

Saturday, September 17, 2011
Monster High shoes with plaster casting soles
It has been some time since I last made any doll shoes. This pair has remained unfinished since March, but I finally decided to finish it.
The soles are plaster castings made with latex moulds. I glued fabric on the sides of the soles and on top of the inner soles made of cardboard.

After gluing the straps in place, I glued the inner soles to the plaster castings and glued in place the outer soles made of leather.


The soles are plaster castings made with latex moulds. I glued fabric on the sides of the soles and on top of the inner soles made of cardboard.

After gluing the straps in place, I glued the inner soles to the plaster castings and glued in place the outer soles made of leather.


Saturday, February 26, 2011
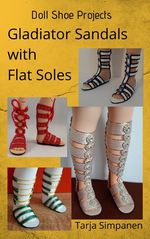
Gladiator sandals
I've been wanting to make gladiator sandals for some doll and decided to make them for the skater doll. After all, this type of sandals are originally supposed to have flat soles.
The first photo shows the parts required: soles, zippers and straps. The straps are made of lace treated with sealer to keep its form. The insoles are pieces of leather with one layer of cardboard underneath. The white cardboard parts shown under the insoles did not make it to the final construction as it turned out that the soles need to be flexible or you can't get the shoes on the doll's feet.

Here you can see the zippers and straps glued in place.

And here is a back view. The problem with reqular sized zippers is that they don't open far enough. With high heel shoes, it is not a problem, but with flat feet, you need to be really careful with the length of the straps.

All that was left to do was gluing the leather outer soles in place. After this experiment, I'd say that buckles would be a better choice for this kind of shoes, although they would require more work both when making the shoes and when putting them on the doll's feet or taking off.

The first photo shows the parts required: soles, zippers and straps. The straps are made of lace treated with sealer to keep its form. The insoles are pieces of leather with one layer of cardboard underneath. The white cardboard parts shown under the insoles did not make it to the final construction as it turned out that the soles need to be flexible or you can't get the shoes on the doll's feet.

Here you can see the zippers and straps glued in place.

And here is a back view. The problem with reqular sized zippers is that they don't open far enough. With high heel shoes, it is not a problem, but with flat feet, you need to be really careful with the length of the straps.

All that was left to do was gluing the leather outer soles in place. After this experiment, I'd say that buckles would be a better choice for this kind of shoes, although they would require more work both when making the shoes and when putting them on the doll's feet or taking off.

Saturday, February 19, 2011
Ballerina shoes
This is one of my newest dolls in her original outfit. Her feet turned out to be almost the same size as the tall blonde doll's, but I still decided to make new shoes for her.

I still have quite a bit of orange silk left and decided to try a pair with lining. After cutting the lining with the pattern I had made, I sewed the lining and upper together (the piece on the right in the photo) and then sewed the seam behind the heel and turned the piece over (the piece on the left in the photo).

The insoles have a piece of leather with one layer of cardboard underneath. I glued the uppers in place, gluing sometimes both layers at the same time, but in more difficult places, first the lining and then the silk.

Finally, I glued the leather outer soles in place. The problem with this construction is that you need to be very careful when sewing the back seam or you'll end up with uppers that are not identical, which is what happened here. The difference is not big, but I see it and it bugs me.

So, I made another pair, this time without lining. When the seam is glued, it is much easier to make the uppers identical. The edge of the fabric was treated with Fray Stay to prevent it from fraying.


I still have quite a bit of orange silk left and decided to try a pair with lining. After cutting the lining with the pattern I had made, I sewed the lining and upper together (the piece on the right in the photo) and then sewed the seam behind the heel and turned the piece over (the piece on the left in the photo).

The insoles have a piece of leather with one layer of cardboard underneath. I glued the uppers in place, gluing sometimes both layers at the same time, but in more difficult places, first the lining and then the silk.

Finally, I glued the leather outer soles in place. The problem with this construction is that you need to be very careful when sewing the back seam or you'll end up with uppers that are not identical, which is what happened here. The difference is not big, but I see it and it bugs me.

So, I made another pair, this time without lining. When the seam is glued, it is much easier to make the uppers identical. The edge of the fabric was treated with Fray Stay to prevent it from fraying.

Subscribe to:
Posts (Atom)